-
Test Service

-
Analysis Service

-
Accreditations/Approvals

- First time visitors
-
- Contact Contact
- JAPANESE
NEWS
NEW TECH
NEWS
NEW TECH
Category
Archive by year
NEW TECH
Introducing portable X-ray residual stress analyzer
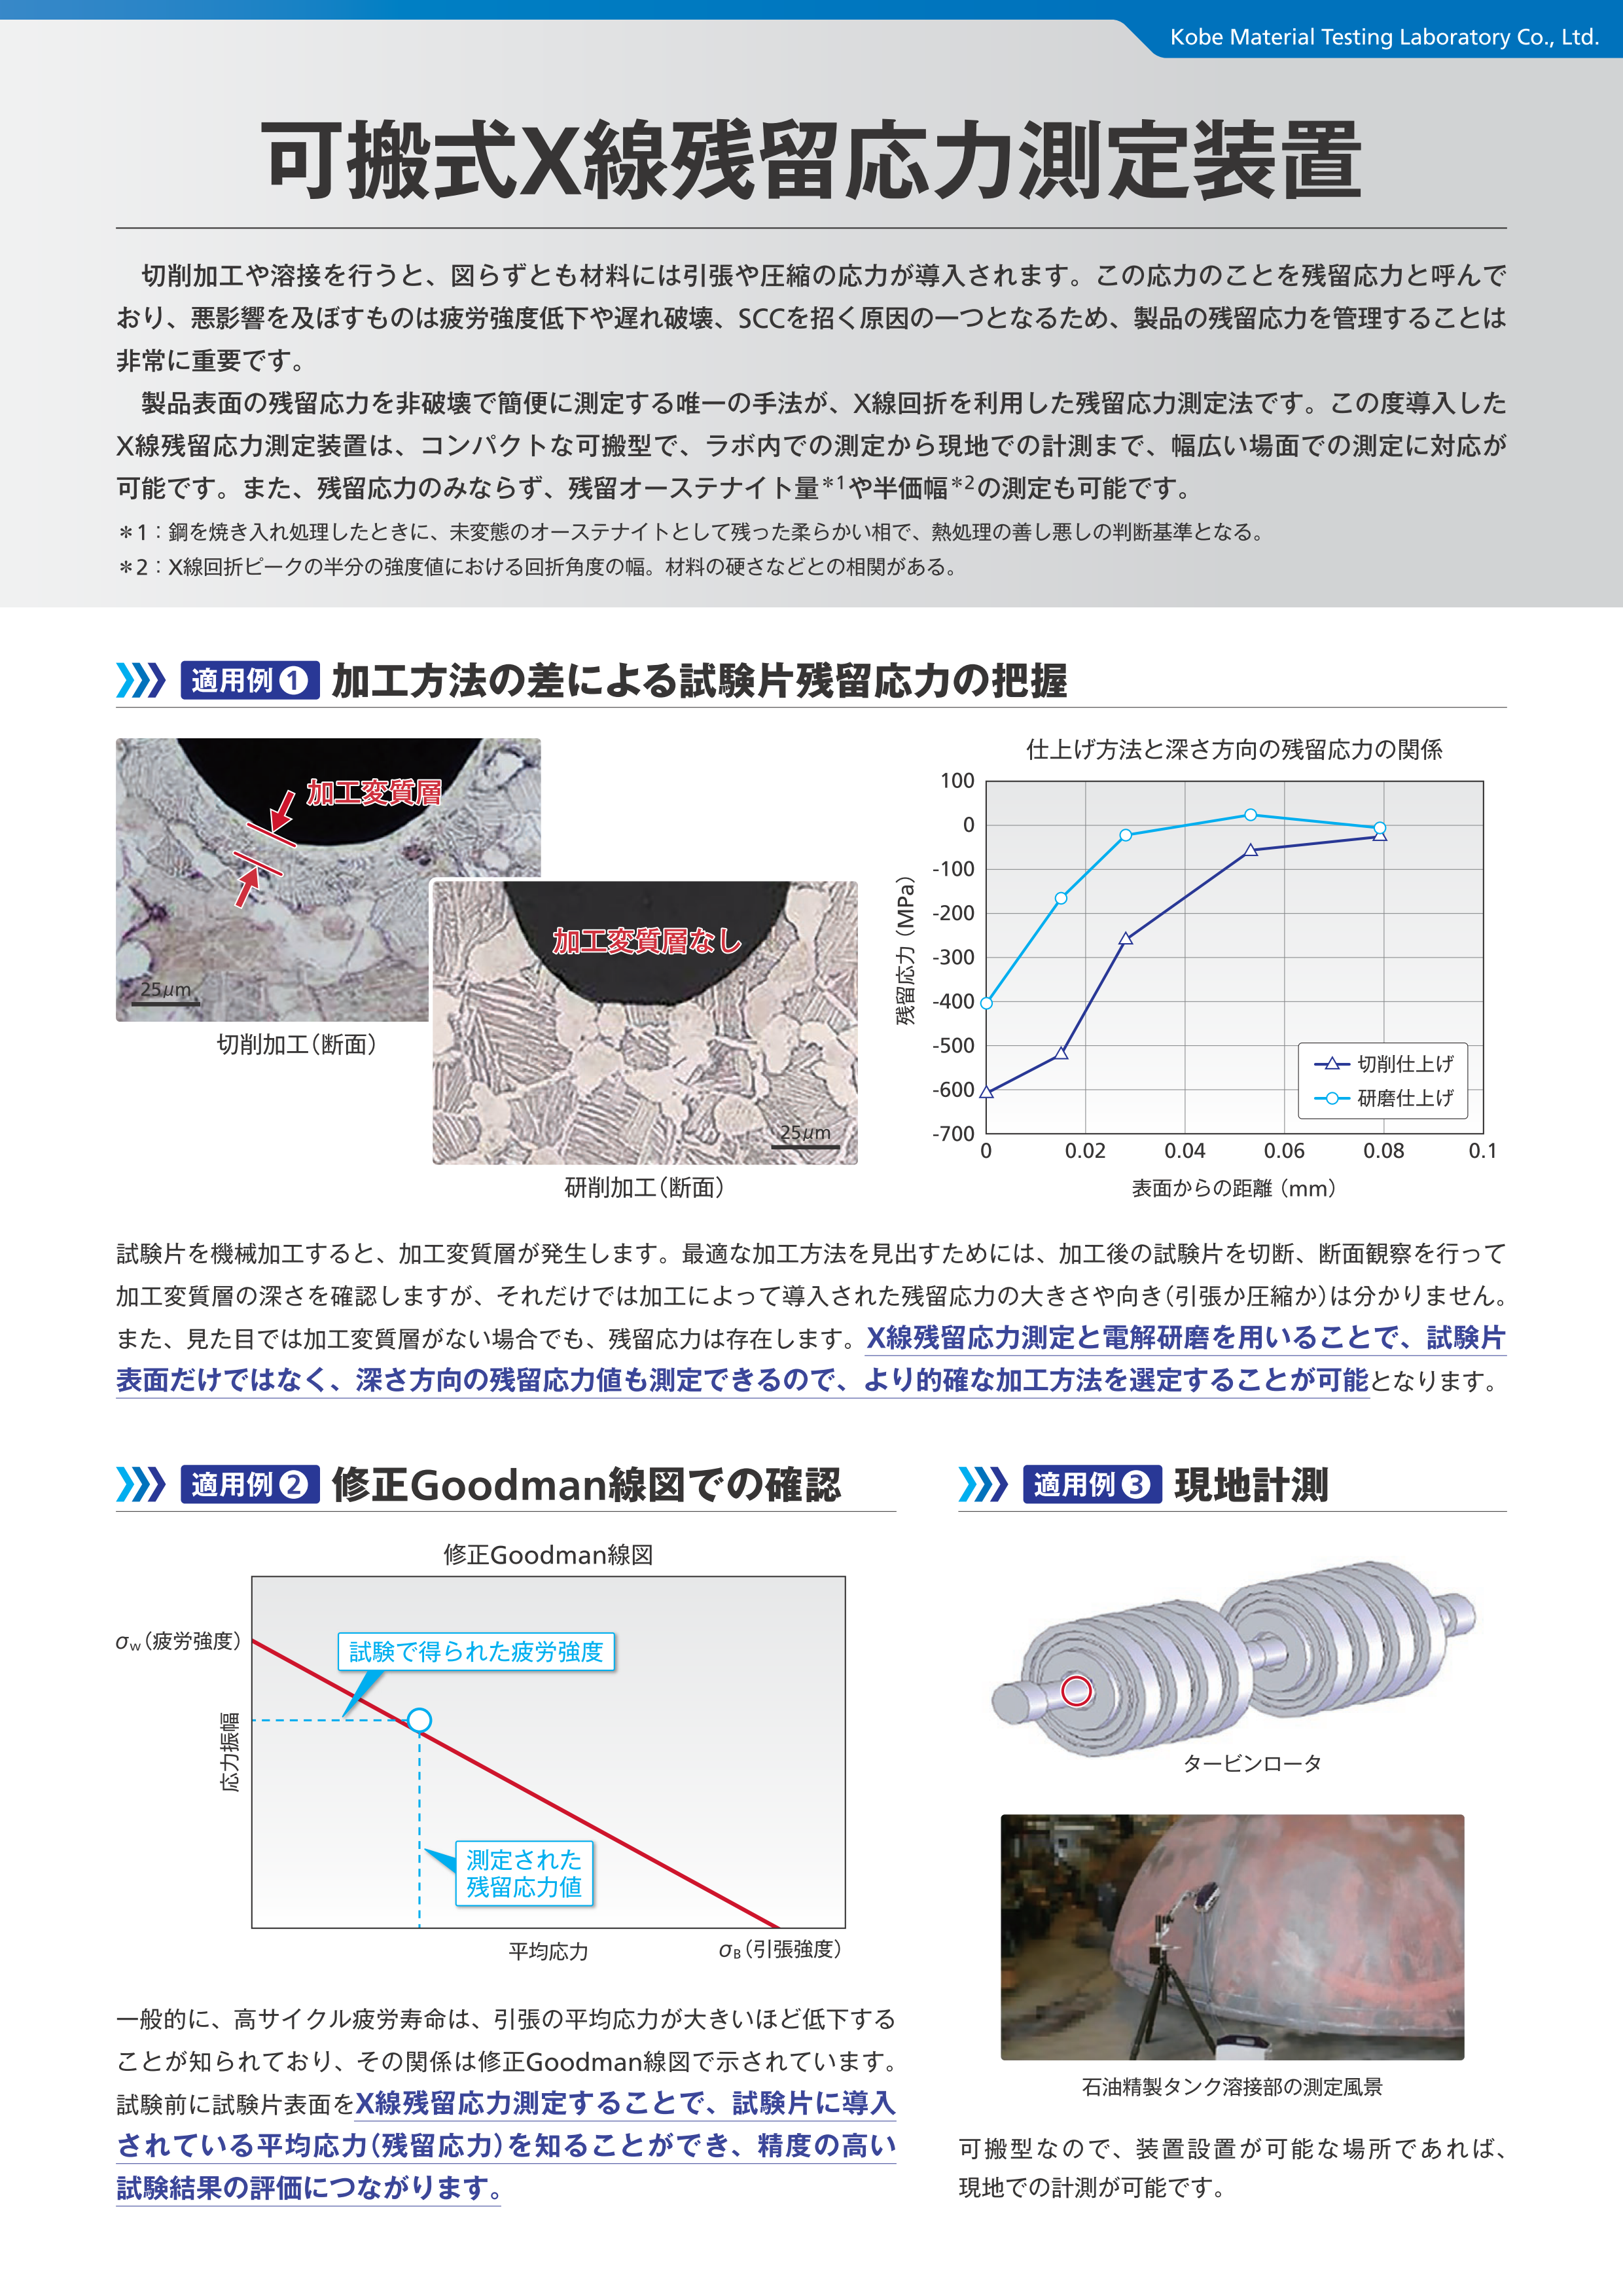
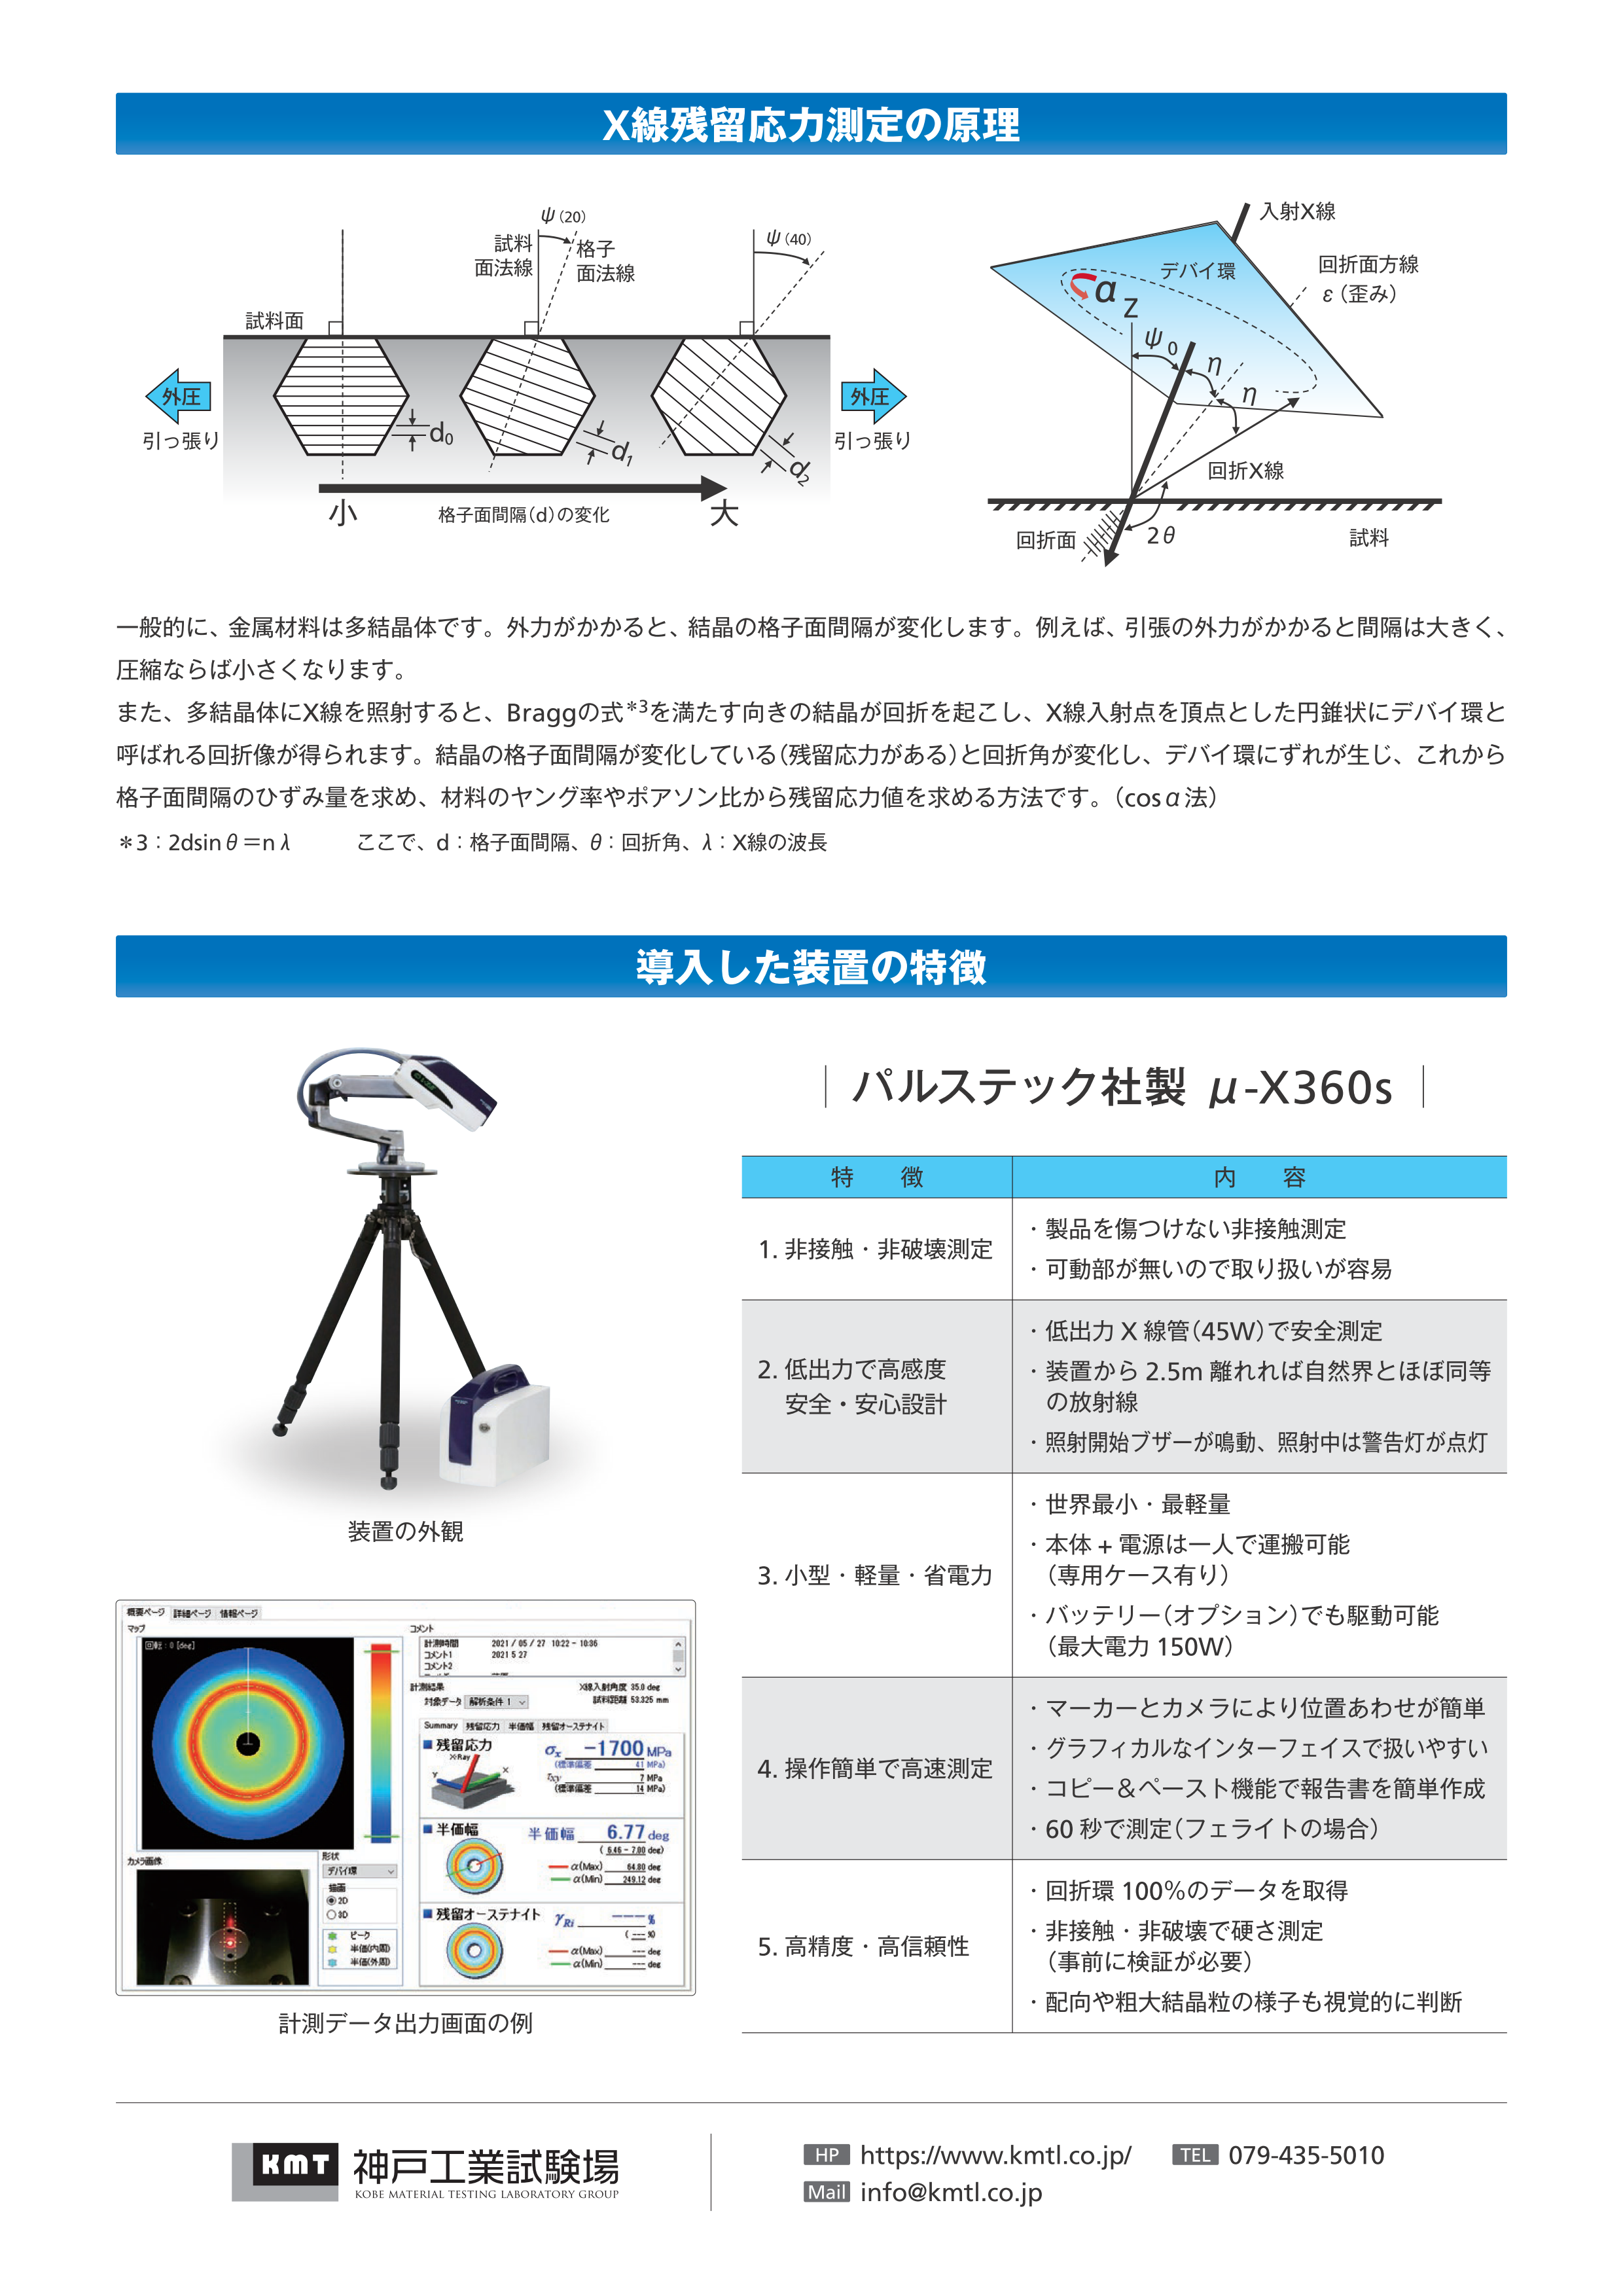
We are excited to announce that we have recently introduced a portable X-ray residual stress analyzer. To introduce this new device, we have created a brochure that we would like to share with you.
When materials are subjected to cutting and welding, they are inevitably subjected to tensile and compressive stresses. These stresses, known as residual stress, can cause adverse effect such as reduced fatigue strength, delayed fracture, and stress corrosion cracking. Therefore, it is crucial to manage residual stresses in products.
The only non-destructive method of measuring residual stresses on the product surfaces is a method by using X-ray diffraction. Our new X-ray residual stress analyzer is compact and portable, enabling measurement both in the laboratory and on-site. Moreover, this analyzer can measure not only residual stresses but also residual austenite content*1 and half-value width*2.
In this brochure, we introduce the testing procedures and what our company can offer with this equipment.
*1 : Residual austenite is the soft phase of untransformed austenite that remains after the heat treatment of steel, used as a criterion for judging the quality of heat treatment.
*2: The width of the diffraction angle at half the intensity value of the X-ray diffraction peak, which correlates with the hardness of the material.
* Click to enlarge * Unauthorized reproduction strictly prohibited.
| The front of our leaflet | Back of our leaflet |
 |
 |
Regarding inquiries
For inquiries related to this matter, please contact us here.


